Posts tagged PSA
PSA: Turn Off iCloud Backup to Prevent Government Surveillance

Given CopyrightBro’s founder’s history of employment with Apple, Inc., we are especially well equipped to serve and inform Apple product owners of the best practices to get the most out of their devices while protecting their privacy. This PSA, like many of our PSAs, is intended for people who use Apple products, and the advice contained herein is not applicable to Android devices or non-Apple PCs. If you have an iPhone or iPad, continue on:

That’s a bold, scary headline, we get it. Here’s what you need to know: there is an intentional design flaw present in Apple’s iCloud Backup system that can allow the government to spy on you and that can provide them with complete access to the full contents of your device. But it is fixable, and we’ll tell you how.

The first question, naturally, is “why is it an intentional flaw?” This is a good question, and the answer is that Apple doesn’t see it as a flaw. iCloud Backups exist to help everyday consumers who either aren’t concerned about privacy or aren’t very tech savvy by giving them a backup plan in case something happens to their device, so that they can just log into iCloud from a new device and recover all their data without missing a beat. It’s intended to be very easy for customers: they happen automatically, they’re turned on by default, and there’s really nothing you need to do, and if you forget your password, Apple can still help you access your data because they keep a spare key. However, this ease of use comes at a price: privacy. Because Apple does keep that key to help you recover your data if you lose your password, the data can never be totally safe. The keys Apple keeps are subject to government subpoenas, meaning the government could at any time force Apple to turn over your iCloud backups, which would provide them with a snapshot of everything on your device at the moment the backup was created.

While Apple wants to be able to help their customers in case they forget their passwords and sees the spare key as a feature, CopyrightBro sees it as a design flaw. We’ve been aware of this flaw for months now, but the reality was that it wasn’t really something that everyday people needed to worry about, so we didn’t warn our readers. However, following the terrorist attack at the U.S. Capitol, the facts on the ground have changed. In recent days, there have been a lot of conversations about domestic terrorism and how the government may adapt to face the challenge that white supremacists, Qanon, and other extremist groups pose to our nation, with a lot of speculation that authorities may seek to expand their power to surveil U.S. citizens to collect intelligence that could aid in the prevention of these types of attacks.

CopyrightBro stands firmly against any and all violent extremist groups, but we don’t believe the United States government needs any more tools to allow them to spy on law abiding U.S. citizens; with just a little bit of reform, we can remove some of the institutional racism that plagues our government agencies, allowing them to be much more effective at stopping far right extremism (or any other domestic terrorism threats) without invading everyone else's privacy.

In the past few months, government officials have argued that we should get rid of end-to-end encryption altogether, but that is simply not feasible and it would put countless vital government and civilian systems in jeopardy of being exploited. Our society depends on some information being able to stay truly private, and we should not budge when it comes to protecting our right to digital privacy.

Given those pushes and the renewed interest among the intelligence community to increase surveillance of American citizens to prevent domestic terrorism, CopyrightBro feels that now is the proper time to warn our readers about this design flaw in the iCloud Backup system. Until Apple implements an option for customers to protect their backups with end-to-end encryption, knowing the risks of holding the only key to their data, iCloud Backups are simply too vulnerable to government overreach to be trusted. However, there are still iCloud tools you can use to protect the vast majority of your data in a manner that (while still not 100% secure in some cases) is much less susceptible to government surveillance.

This is what CopyrightBro recommends:

  1. Go to Settings → [Your Name] → iCloud

  2. Scroll down and tap “iCloud Backup,” then switch the toggle OFF.

  3. Go back to the previous screen, and under the section called “Apps Using iCloud,” make sure all of the toggles here are switched ON, including “Messages.” These toggles control which of your data use iCloud to sync between devices, and are therefore preserved in iCloud. If you leave any of these switches off and you don’t have a backup, the data in that app won’t be saved if something were to happen to your device.

  4. Tap “Manage Storage" near the top of the page, and then scan the list for any leftover backups. If you find one, tap on it, and then tap delete. You’ll likely have a couple, do this for each of them.

It’s unfortunate, but until such time as Apple introduces a truly private iCloud backup option, disabling it and instead relying on the iCloud syncing toggles is the best balance between privacy and protecting your data.
PSA: Get To Know FaceTime's Cool Little Brother, FaceTime Audio

Everyone with an iPhone has used FaceTime to make a video call, but few people know much about FaceTime’s little brother, FaceTime Audio. While it doesn’t sound like anything special, it actually has some pretty significant benefits that you should take advantage of every time you can.

FaceTime Audio is essentially an alternative to the traditional phone call. It’s voice only, (no video) so a lot of people assume it’s no different than calling someone using their phone number, but that’s not true at all. FaceTime Audio has a couple big perks over traditional phone calls.

One benefit is that FaceTime Audio calls are made over the internet, rather than using the standard, old school technology that cell phone carriers use when you make a traditional call. Because they use VoIP (Voice over Internet Protocol), if you have a strong internet connection (whether via wifi or your carrier’s LTE towers), your calls will likely sound clearer than if you’d make a traditional call. It also means that you don’t need a cell phone plan to make a FaceTime Audio call if you have wifi.

Another big benefit is that nobody can listen in on calls you make using FaceTime Audio. When you make a standard phone call, your carrier and the government has tools that allows them to eavesdrop on your call (thanks to the Patriot Act). Fortunately for us, Apple decided to protect FaceTime Audio using end-to-end encryption, which means that there’s no way for someone who isn’t directly included on the call to decrypt its contents. When we say no one, we mean no one — not your carrier, not the government, not Anonymous, not even Apple. It’s as secure as it gets.

IMG_3577.jpeg

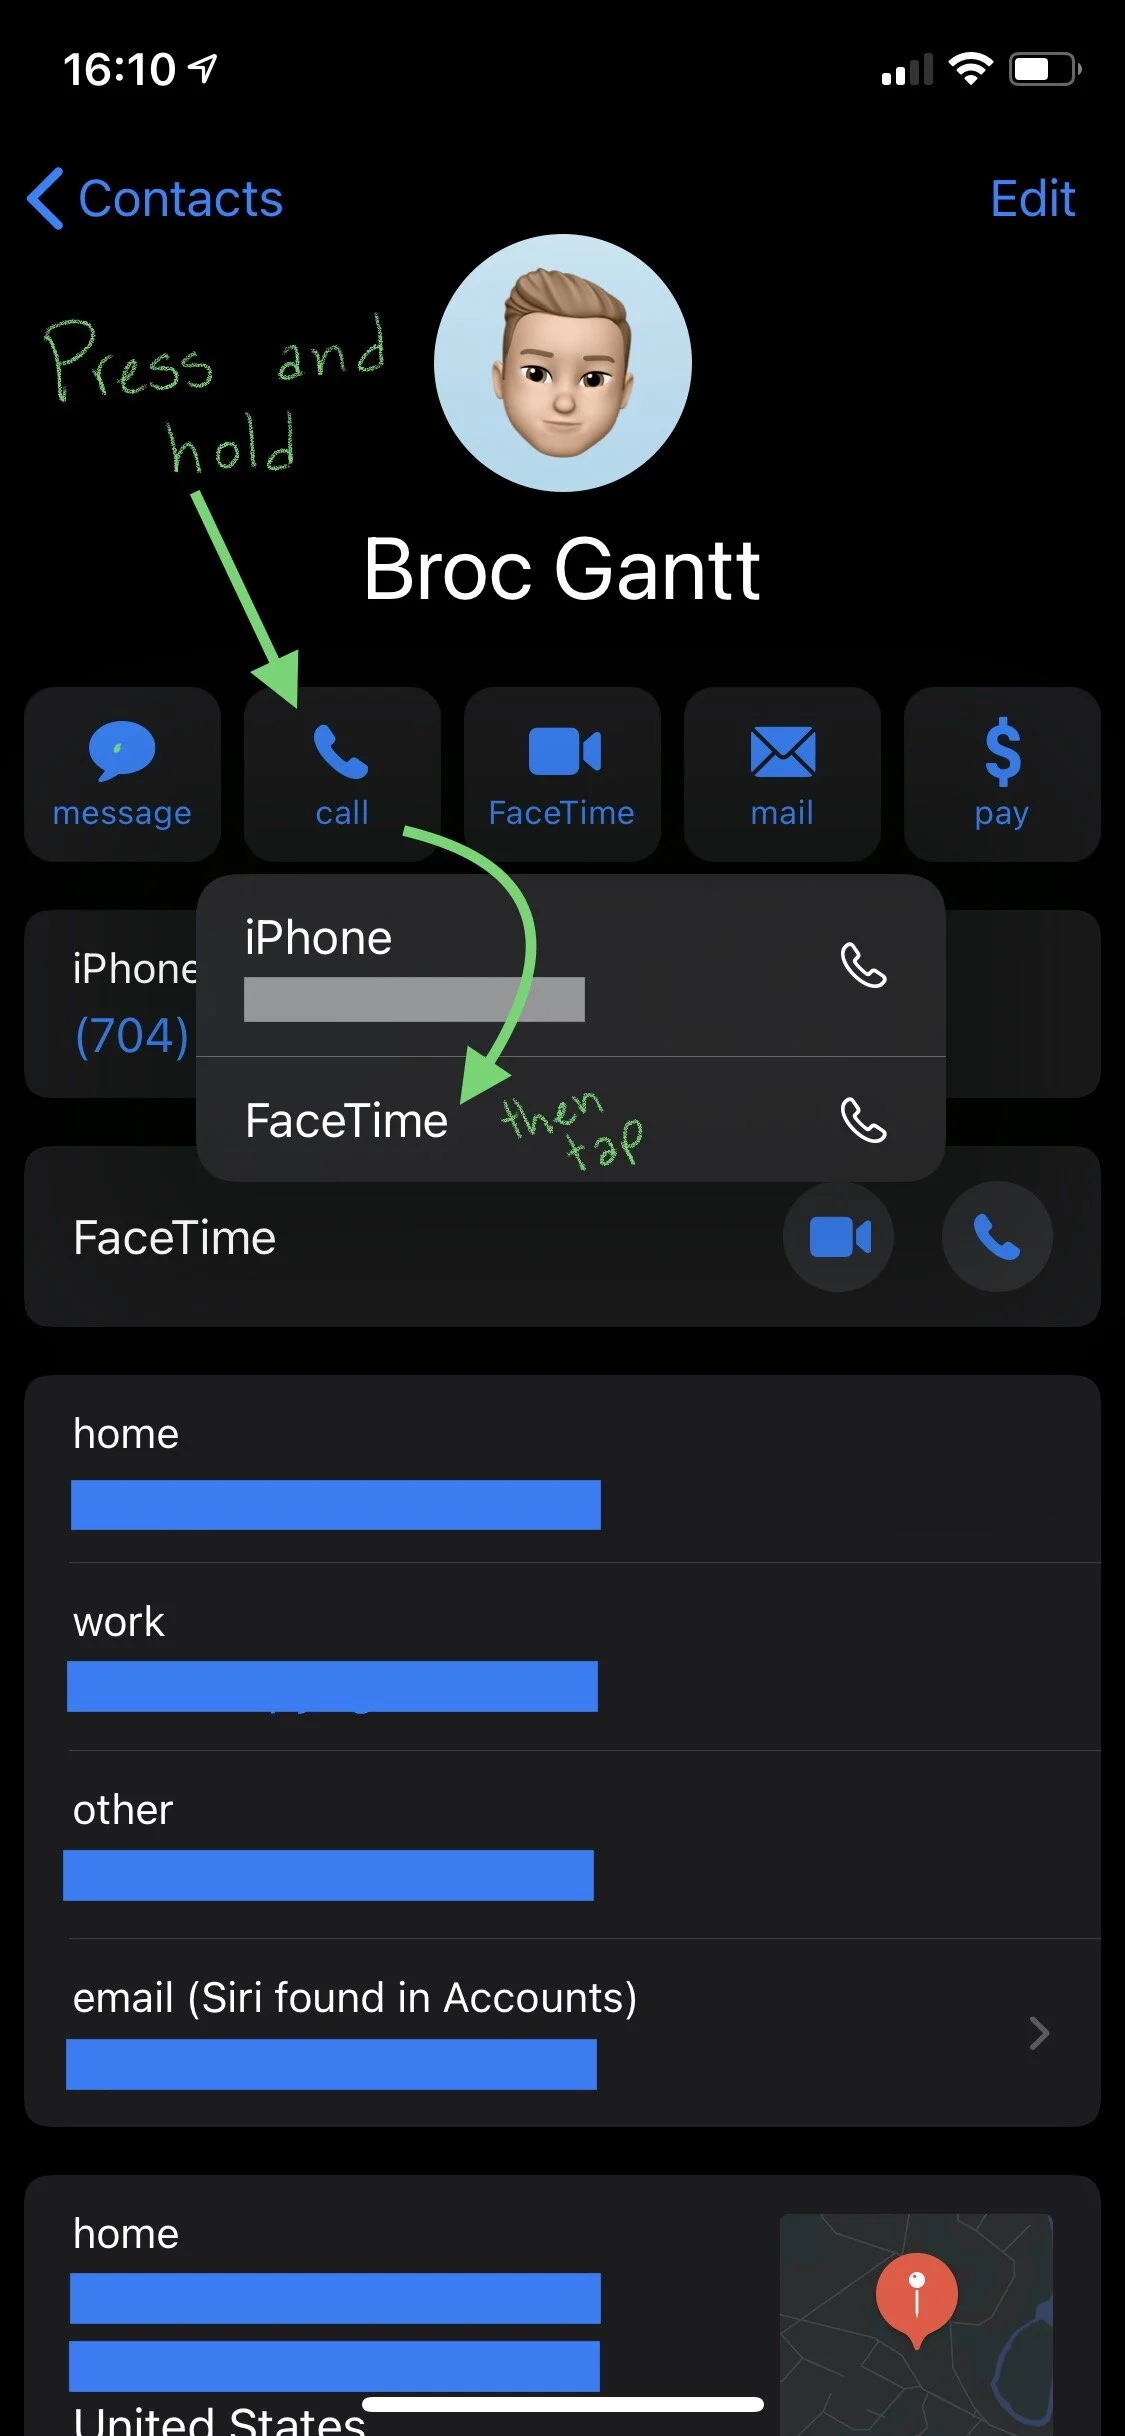
To make a phone call using FaceTime Audio, you have a few options. You can initiate the call by just asking Siri to “make a FaceTime Audio call to [person you want to call]”, or you can start it via either the Contacts, Phone, or Messages apps by tapping and holding on the phone button by a person’s name to see a list of call options, and then choosing “FaceTime Audio”. And that’s it. Pretty simple.

Voila! Go forth, and insist that all your friends use FaceTime Audio so as to never have to talk to you on an unprotected, fuzzy sounding, old school phone call ever again.

PSA: Sign In With Apple

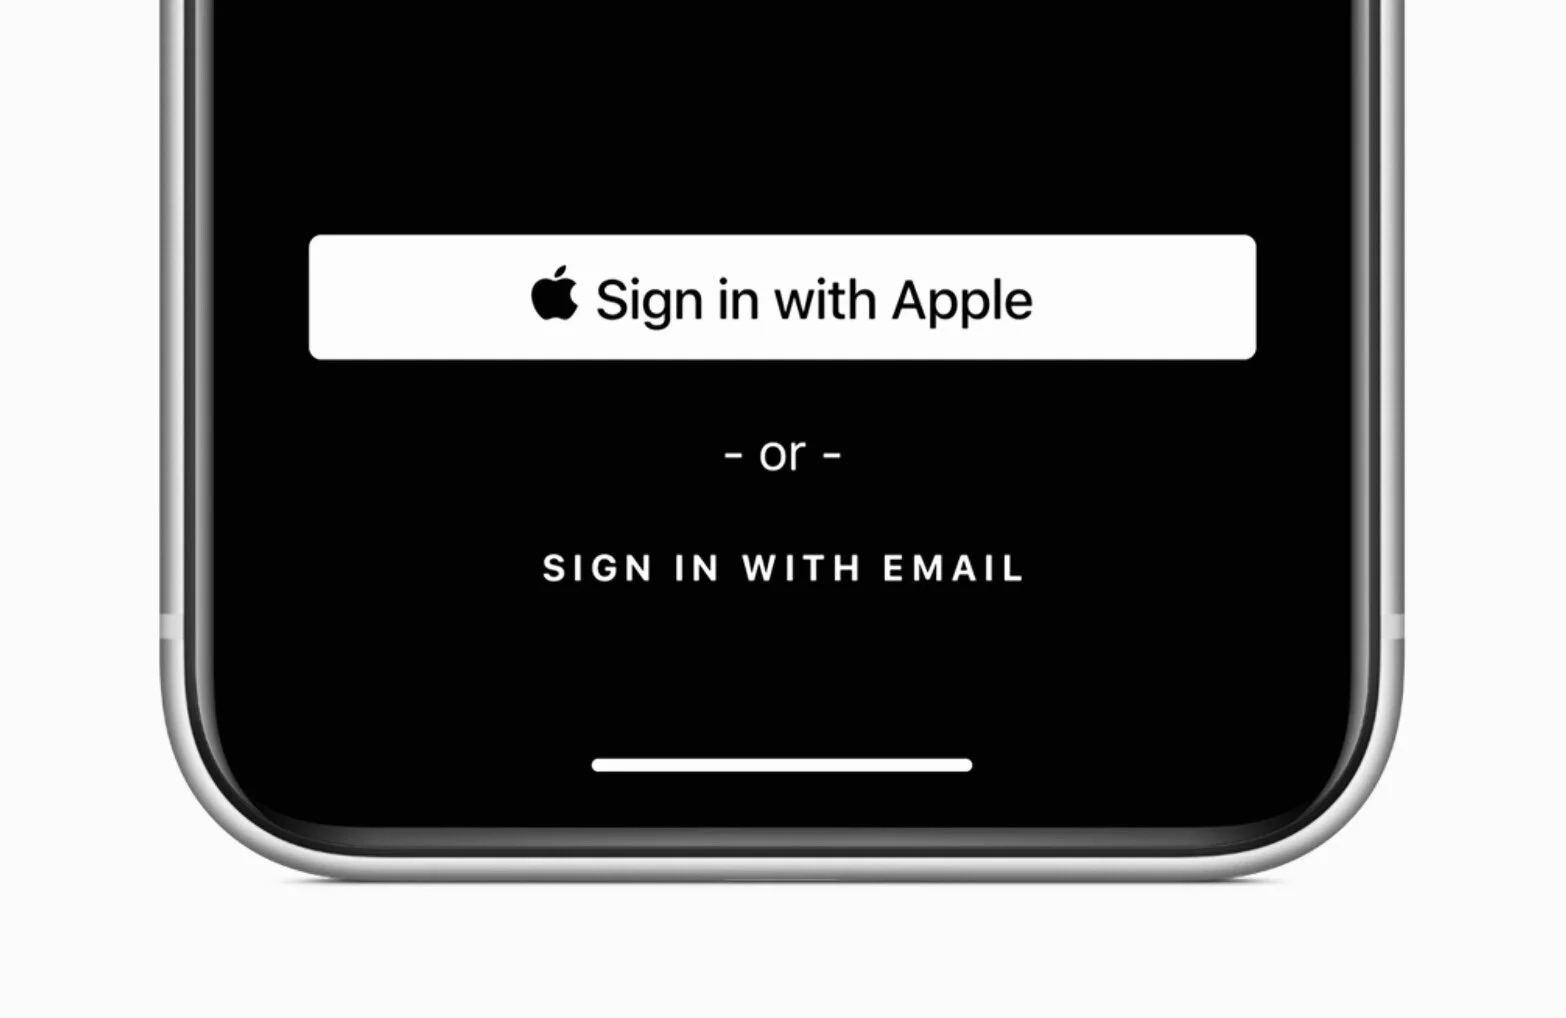
As of today, many apps that are submitted for approval to be distributed through Apple’s App Store are required to support a new feature called Sign In With Apple. This is great news for you!

If you’re not familiar, Sign In With Apple is an excellent, user focused feature designed to make it easier to sign in to apps while protecting your privacy. Put simply, it’s a button that will allow you to quickly sign up for/sign in to apps with just a few taps, without having to remember a password or fill out long forms. It gives the application a very limited amount of information about you, including only a name (which you can change if you like) and an email address (which you can opt to disguise in case might later want to be able to easily revoke the app’s ability to email you).

As mentioned above, starting today, all apps that support other third party log in buttons — like the Facebook and Google sign in buttons — are now required to support Sign In With Apple as well, guaranteeing that users have a more private and secure alternative that affords them the same level of convenience. As it stands, Facebook and Google’s buttons are harmful because they set up a link between the tech giants and the app or website you’re using them to sign in to, creating a tunnel for an unfettered flow of your personal information between those entities and the apps, which can be used for targeted advertising and other user hostile practices.

If you have an Apple product*, I would strongly encourage you to start using Sign In With Apple. Not only is it safer and more private than the other third party sign in buttons, but it’s faster too, because you authenticate with Touch ID or Face ID rather than having to type in your Facebook or Google password with their respective sign in buttons.

If you ever need to manage the apps that you let use Sign In With Apple, you can do so on an iPhone or iPad by going to Settings → (Your Name) → Password & Security. You can also do this on a Mac under System Preferences → Apple ID → Password & Security, or on the Apple ID website.

*Note: if you haven’t already, you must first enable two-factor authentication to use Sign In With Apple. To do so on a iPhone or iPad, go to Settings → (Your Name) → Password & Security.

PSA: Law Enforcement Can Trick You Into Giving Them Access to Your Phone

I’ve written before on the contentious relationship between privacy advocates and law enforcement agencies, who are all the time encroaching further upon your personal privacy. Be sure to check out this article on defending yourself with a strong passcode.

Recently it was reported by NBC News that Grayshift, the company responsible for developing the atrocity that is the GrayKey device (used to unlock citizens’ iPhones via brute force passcode attempts [learn how to protect your device here]), has developed software they call HideUI, which is malware designed to trick people into unlocking their devices for police officers.

In order for this feature to work, law enforcement officials must install the covert software and then set up a scenario to put a seized device back into the hands of the suspect, said the people familiar with the system. […] For example, a law enforcement official could tell the suspect they can call their lawyer or take some phone numbers off the device. Once the suspect has done this, even if they lock their phone again, Hide UI will have stored the passcode in a text file that can be extracted the next time the phone is plugged into the GrayKey device. Law enforcement can then use the passcode to unlock the phone and extract all the data stored on it.

If law enforcement takes your phone out of your sight for even a second, assume they’ve installed HideUI on it. Consider it a complete loss, and buy a new one. If they give it back to you for any reason, refuse to unlock it. Throw it in a lake. Do not trust them or the device.

Furthermore, many courts have determined that while they can compel people to provide biometric data like fingerprints or their face to unlock a device (in line with precedents that allow them to compel you to provide DNA or hand writing samples), they generally cannot force you to provide an alphanumeric passcode to unlock the device because it is considered self-incrimination and a violation of your fifth amendment rights. You may be wondering why it even matters if they can still force you to unlock your device with your fingerprint or face. But, there’s one little tip you can use to ensure that your device can ONLY be unlocked by your passcode. If you turn your phone off before allowing law enforcement to take it, it will require a passcode when it’s turned back on. You can also disable biometric authentication in just two seconds by holding your phone’s volume button and power button at the same time.

This is why HideUI is dangerous: in many cases, law enforcement knows that they’d be unable to access your device lawfully, so they resort to shady tactics to trick you into giving them the master key, your passcode.

I strongly doubt any of my readers are criminals nor likely to be arrested for any reason, but as the government continues its encroachment upon our liberties, it’s important to remember our rights, and use the tools available to us to protect them from infringement. Use a strong passcode. Make sure your device is locked with biometric authentication disabled (via the side button/volume button trick) before allowing law enforcement physical access to your device. And don’t trust your phone if they take it out of your sight.

PSA: Facebook Buys GIPHY

Mitchell Broussard for MacRumors:

Facebook today announced that it has acquired the popular GIF sharing platform GIPHY. […]

The sum of the GIPHY acquisition by Facebook is reportedly around $400 million, according to Axios.

Terrific. It’s curious though, isn’t it? Why would Facebook pay $400M to acquire a service that just sends gifs?

John Gruber:

Of course Giphy is going to retain its own brand. If they renamed it to “Facebook Tracking Pixels”, usage might drop off. Think about all the messaging apps that don’t offer Facebook integration for security/privacy reasons […], where Giphy images appear. You know, like Apple’s Messages. Well, now Facebook has tracking pixels in them.

Ah, that’s why. Not sure what tracking pixels are? Spoiler alert, they’re bad news. A lot of emails have them as well, and you should do what you can to avoid them.

Check out this great gif keyboard, aptly named “GIF Keyboard”.

#deletefacebook

PSA: You Should Be Using Apple Pay All The Time

I love Apple Pay, and you will too. Let me tell you why.

First things first, it’s important to make the distinction between Apple Pay, the payment facilitation service, and Apple Card, Apple’s recently launched credit card offering. This article is about the payment facilitation service, bu you can click here to see my thoughts on Apple Card, if you’re interested.

There are two primary reasons that I love Apple Pay: financial security/privacy protections and convenience. In both areas, Apple Pay is truly top of class.

Convenience

When it comes to convenience, Apple Pay is hard to beat because it’s lightning fast and can be used in a variety of contexts.

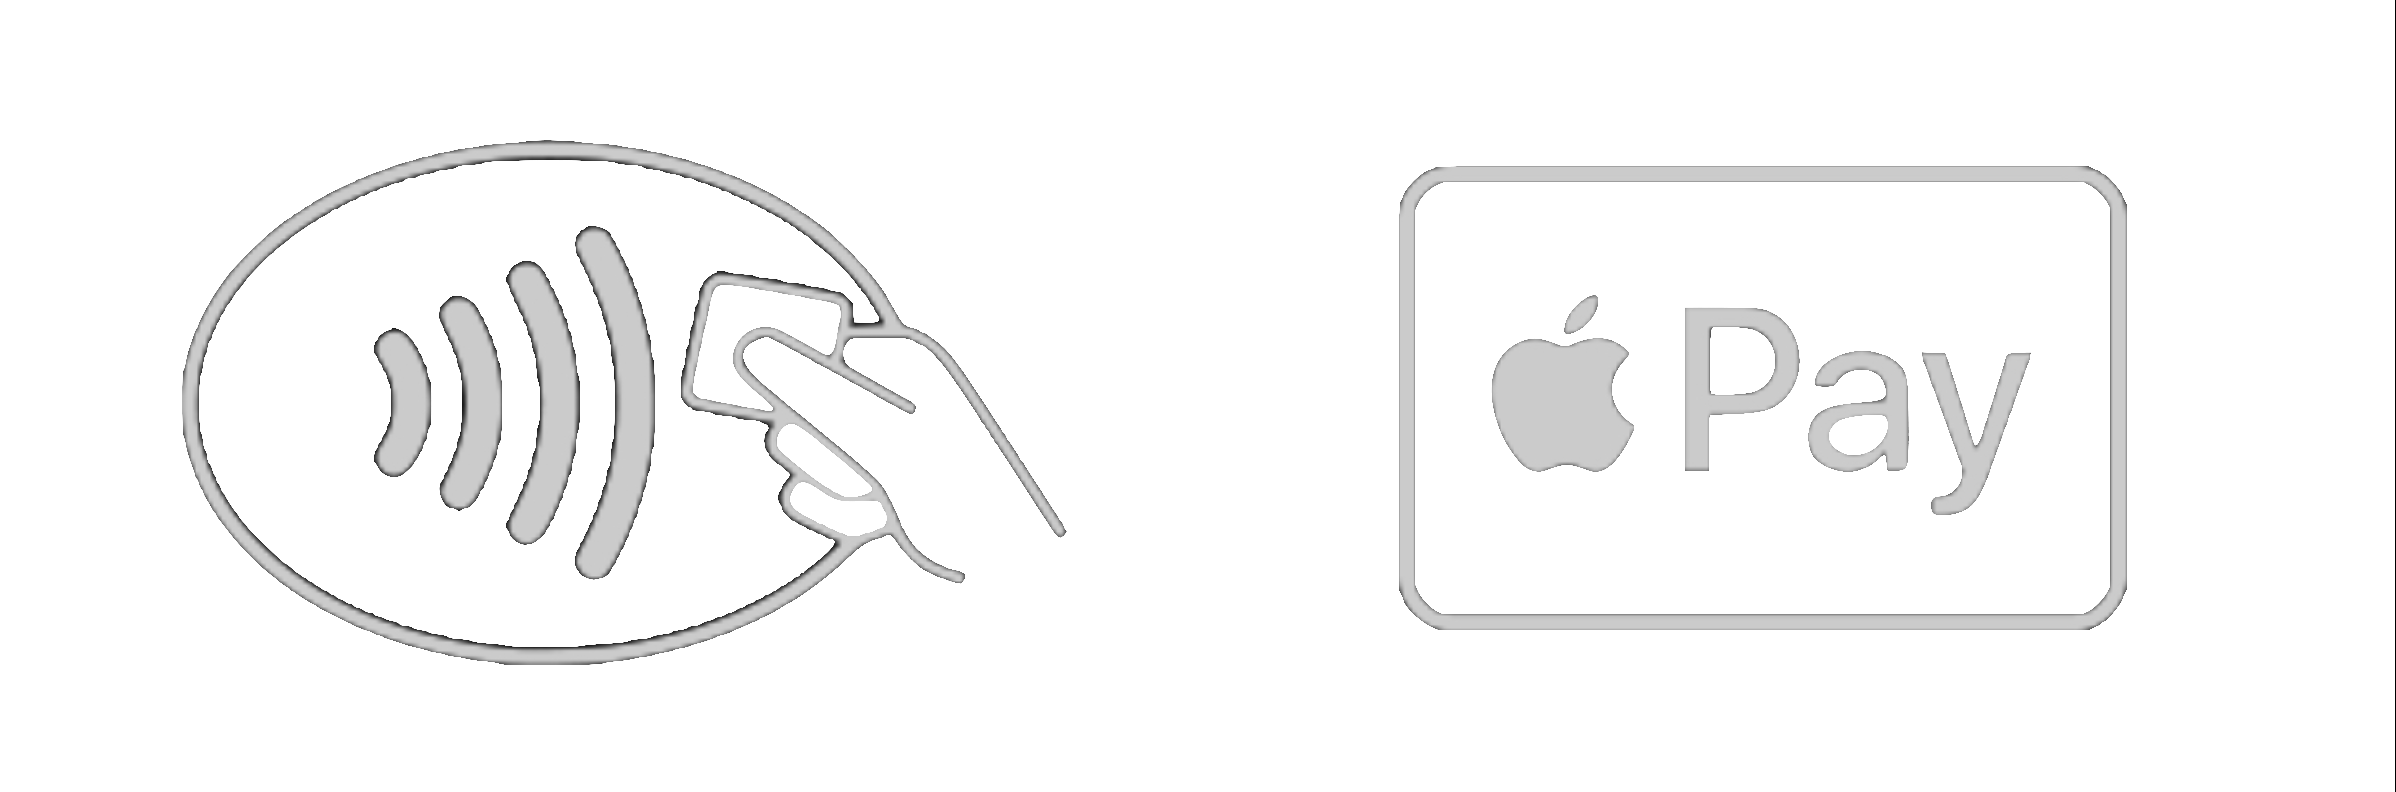
Primarily, Apple Pay was designed to replace your physical card when you need to pay for something in a brick and mortar store. It works a lot faster than the chip cards, and it doesn’t require any physical contact between your device and the payment terminal (this is obviously a plus, given that we’re in the middle of a pandemic). After you’ve added your card to Apple Pay, the Wallet app will offer more detailed transaction lists than most bank accounts provide (whether you used the version of your card in Apple Pay or the physical card), which are easy to read and even include location data so you know exactly where that transaction took place. It really comes in handy if you need to purchase something and find you’ve forgotten your wallet or purse. Most retailers accept Apple Pay these days, and I personally prefer to shop at places that do because it’s so much faster than swiping or inserting a physical card. You can use Apple Pay anywhere you see one of these two symbols:

 
IMG_2588.png
 

However, Apple Pay isn’t limited to in-store use: you can also use Apple Pay in apps and on websites on your iPhone, iPad, and Mac to quickly pay for things with just one step. It’s great when you want to order something from a merchant you don’t frequently purchase from because it keeps your payment information private and doesn’t require you to create an account with that retailer.

Most recently, Apple Pay has expanded to allow individuals to send money to other Apple Pay users directly through the built in Messages apps from their iPhone, Apple Watch, or iPad. This expansion challenges popular services like Venmo and the Cash App, and it gives Apple users another, more convenient option to send money to their friends without needing to install separate apps that have their own security and privacy baggage. To facilitate payments between individuals, Apple has also created a digital Apple Cash card, which works just like your other credit and debit cards. Whenever you receive money from someone, this card is essentially the debit card account where that money lives, until you either spend it using Apple Pay (which you can do in stores or online), send it to someone else, or transfer the funds to your bank account.

Security & Privacy

A common misconception is that Apple Pay is not very safe because it’s digital, but in fact, the opposite is true. Apple Pay is so secure that it’s actually safer than using your real credit or debit card in brick and mortar stores, online, or in apps. Let me elaborate.

When you add your card to Apple Pay, your device will create a new 16-digit card number (called a device account number) which will be given to merchants when you use Apple Pay for a transaction. This number is unique to your device, and it cannot be unscrambled or put through any sort of algorithm to spit out your real card number. This means that if someone were to get their hands on your device account number, they wouldn’t be able to use it to steal your money. For example, when a merchant’s payment system gets hacked and bad actors get ahold of a bunch of people’s credit card numbers (like what happened with Target in 2013), had you been using Apple Pay, they would’ve only gotten your device account number, not your real credit or debit card number (because your device never gave Target your real number). They wouldn’t have been able to steal any money, and you wouldn’t need to get a new card from your bank. In fact, you wouldn’t have had to do anything at all.

The reason for that is that each Apple Pay transaction you initiate requires a unique token code that is specific to the time and date, the amount of money you’re trying to spend, and the merchant trying to process the transaction. This works in concert with the Device Account Number, and if all of those elements don’t check out, the transaction won’t be authorized.

Even still, cards you add to Apple Pay are never stored in iCloud or Apple servers, and are protected by your device’s passcode and biometric authentication systems, meaning that even if a bad actor somehow got around the protections offered by the device account number and the token code, they would still have to have physical possession of your device, AND know your passcode.

There is really no imaginable way in which this system could be thwarted.

Adding Your Card in Wallet

So, you’re interested, but how do you set it up and try it out? I’ll help you get started.

The process for setting up Apple Pay is largely the same across devices. You’ll scan your card with your device’s camera or just type in the numbers manually, and in some cases you’ll need to verify your identity with your bank, usually through a text message authentication code. If your device doesn’t already have a passcode (which it absolutely should, even Apple Watches*)

To set up Apple Pay on your iPhone, go to the Wallet app and tap the + button in the top right corner, then choose “Credit or Debit Card”, and follow the steps to add your card.

To set up Apple Pay on your Apple Watch, start off by going to the Watch app on your iPhone, tap Wallet & Apple Pay → Add A New Card.

To set up Apple Pay on your iPad, go to Settings → Wallet & Apple Pay → Add A New Card.

To set up Apple Pay on your Mac, go to System Preferences → Wallet & Apple Pay, and click the + button.

If you have any trouble along the way, check out Apple’s “Set Up Apple Pay” support page, or get help from CopyrightBro by selecting “Tech Help” from the menu and filing a support request.

Using Apple Pay

Actually using Apple Pay couldn’t be any easier.

To use Apple Pay in stores:

With an iPhone:

If your iPhone has Face ID:

Open the Wallet app, or double click the side button to quickly open the Wallet app with your default payment card ready to go. If you want to use a different card, just slide your default card down and your other cards will pop up. Choose the one you’d like to use, authenticate with Face ID, and hold your device near the payment terminal when the merchant is ready. You should feel a little pulse, hear a chime, and see a checkmark appear on screen: these cues are just letting you know you’ve done your part to complete the transaction.

If your iPhone has Touch ID:

Open the Wallet app, or double click the home button from the lock screen to quickly open the Wallet app with your default payment card ready to go. If you want to use a different card, just slide your default card down and your other cards will pop up. Choose the one you’d like to use, authenticate with Touch ID, and hold your device near the payment terminal when the merchant is ready. You should feel a little pulse, hear a chime, and see a checkmark appear on screen: these cues are just letting you know you’ve done your part to complete the transaction.

With an Apple Watch:

Open the Wallet app, or double click the side button (the flat one that doesn’t turn) to quickly open the Wallet app with your default payment card ready to go. If you want to use a different card, just slide your default card to the left to access the next card in your wallet. Hold your Watch near the payment terminal. You should feel a little pulse, hear a chime, and see a checkmark appear on screen: these cues are just letting you know you’ve done your part to complete the transaction.

To use Apple Pay in apps and online:

With an iPhone, iPad, or Mac:

Click or tap on the button that says “Pay with  Pay”, confirm all of the details that appear, select the card you want to use and the appropriate billing/shipping addresses, and then authenticate with Touch ID or Face ID. You should feel a little pulse, hear a chime, and see a checkmark appear on screen: these cues are just letting you know you’ve done your part to complete the transaction.

To use Apple Pay to send money to friends:

With an iPhone or iPad:

Go to the Messages app and open a conversation with the person you’d like to send money to. Choose the Pay button from the app drawer that shows up at the bottom of the screen when the keyboard is dismissed. Select the amount you want using the +/- buttons or the keypad, and then tap “Request” or “Pay” depending on whether you want to send or ask for money. You can also type a message to send with the request or payment denoting what it’s for. If requesting, you can send the request by tapping the send button. If sending money, an Apple Pay screen will pop up when you tap the send button, prompting you to review the details of your payment and then authenticate with Touch ID or Face ID to complete it. You should feel a little pulse, hear a chime, and see a checkmark appear on screen: these cues are just letting you know you’ve completed the payment.

With an Apple Watch:

Open Messages and chose a conversation with the person you want to send money to. Tap the Pay button, adjust the amount you want to send, and then double tap the side button to confirm the payment.You should feel a little pulse, hear a chime, and see a checkmark appear on screen: these cues are just letting you know you’ve completed the payment.

Next time you go to the store, you’ll be delighted by how much faster it is to pay for your items. Next time a retailer you frequent has their payment systems compromised, you won’t have to freak out because some stranger might have your debit card number. Apple Pay solves a lot of problems, and it’s also delightful to use. Try it out for a few weeks: you won’t want to go back.

*If you don’t have an Apple Watch, or you already have a passcode on your Watch, you can skip this paragraph. If you do have one but you haven’t set up a passcode, read on. Since the Apple Watch doesn’t have a biometric authentication system yet (like Touch ID or Face ID), you do have to set up a passcode on your watch to use Apple Pay — but that’s a smart idea anyway, because it protects your data and makes your device less appealing to thieves through a sort of digital herd immunity — I know it sounds cumbersome, and a lot of people think that having a passcode on their watch means typing in a number on a tiny screen every time you want to reply to a quick text or check the time, but that’s not the case. You actually only have to put the passcode in one time after you put the watch on, and it will recognize that it’s still on your wrist and not require it again until you’ve taken the watch off and put it back on again. You can set up Apple Pay on your Apple Watch through the Watch app.

PSA: Zoom Is Dangerous and You Shouldn’t Use It

I don't write articles on subjects where I feel like I wouldn’t truly be adding something to the conversation, and this is a case where I considered not writing this piece. It has already been covered more thoroughly than I am capable of doing here, but I felt it was still worthwhile to reiterate what others have exposed and warn the public of the dangers Zoom presents.

Most people didn’t know too much about Zoom before the pandemic started and hoards of people were suddenly tasked with finding a way to perform their jobs from home. Now, Zoom is a household name, and millions of people are being herded into their user base like swine into a slaughterhouse. Personally, I’ve never used Zoom: I rarely have the need to video conference with more than one person, and in instances where I have needed to, Group FaceTime was more than sufficient. Based on Zoom’s reputation and their habit of completely abusing their users, I would never use their services, and in fact, I think they’re such a malignant company that I’m taking the time to warn CopyrightBro readers.

Last summer, news broke that quickly turned into a scandal, when it was revealed that Zoom was flagrantly abusing users’ trust by having their app automatically reinstall itself after it had been deleted by the user, and then go on to start a Zoom call (with the webcam and microphone enabled) to any website that knew this “feature” existed and wanted to take advantage of it. This was the instance that made me distrust Zoom, and again, this was nearly a year ago.

Now, even more evidence has come out illustrating just how low user security and privacy rank on Zoom’s list of priorities.

  • Last week, Motherboard reported that Zoom was using software development kits (SDKs) created by Facebook that sends Zoom users’ personal data to Facebook, regardless of whether those Zoom users also had Facebook accounts. They have since removed this SDK, but the fact that it was used in the first place is cause for concern.

  • A few days later, The Intercept reported that Zoom was flat out lying about how Zoom meetings are encrypted and trying to pass it off as a marketing miscommunication. As John Gruber notes on Daring Fireball, the phrase "end-to-end encryption” is not open to interpretation. What Zoom was actually using is called transport encryption, and it is not as secure. Lying about how secure your platform is will certainly lead to trouble for users. It’s unethical and gross to use false claims of strong encryption for marketing.

  • Yesterday, Motherboard reported another issue that allowed Zoom users’ personal email addresses and photos to be leaked to complete strangers.

This is a staggering list of major privacy and security concerns for one company to deal with in a year, much less in a week. If your organization is asking you to use Zoom, you should forcefully object and tell them that you don’t agree with their privacy policy (which is a joke). If video conferencing is a must for you, suggest an alternative like Group FaceTime (check out this list from The Verge for some more options). If you absolutely cannot refuse to use Zoom, follow John Gruber’s advice and only use it on an iOS device, where Apple’s sandboxing will protect you more than any other platform is capable of doing. If you don’t use an Apple device, here’s another reason to consider switching.

#deletefacebook

UPDATED: 04/02/20, 13:00

PSA: You Need A Stronger iPhone Passcode

This story for The New York Times by Jack Nicas is primarily about the Pensacola shooter’s iPhone, (a story that we commented on a few days ago to highlight the danger of the FBI’s public attack on encryption), but it raises another good point about device security. Machines exist that are capable of unlocking Apple devices via a brute force method that tricks the iPhone or iPad into allowing an unlimited number of passcode attempts in quick succession. Essentially, this means that one of these devices could break into your phone in as little as a few minutes.

A four-number passcode, the previous default length, would take on average about seven minutes to guess. If it’s six digits [the current default length], it would take on average about 11 hours. Eight digits: 46 days. Ten digits: 12.5 years.

If the passcode uses both numbers and letters, there are far more possible passcodes — and thus cracking it takes much longer. A six-character alphanumeric passcode would take on average 72 years to guess.

The point is that you need to use a strong passcode if you want to truly protect yourself from brute force threats like those posed by anyone in possession of one of these aggressive little boxes, whether that’s law enforcement or an individual will ill intent who manages to get their hands on one of them. Apple does all they can to fix bugs that allow these devices to work, but there’s only so much they can do: security is a cat and mouse game, and you’ve gotta look out for yourself. I’ve been using a seven digit alphanumeric passcode for about two years, and it hardly takes any longer to punch in than the six digit passcode you’re probably already using. Plus, if you’re using Touch ID or Face ID, you probably don’t type in your passcode most of the time when you unlock your device anyway.

To set up an alphanumeric passcode on your iOS device, open Settings → Face ID & Passcode (it may say “Touch ID & Passcode”, depending on what device you have). It will then prompt you to enter your current password. After you’ve punched it in, tap “Change Passcode”. It will prompt you to enter your passcode again, and then slide to the next screen where you can either enter a new passcode. Above the keypad, tap “Passcode Options”, and select “Custom Alphanumeric Code”. This will allow you to set up a passcode that uses a combination of numbers and letters: be sure to include at least one of each, maybe an uppercase letter, and shoot for at least 6 characters. After you enter the new passcode, it will have you confirm it, and then you’re done! Congrats, you just protected your iPhone for about 70 years worth of underhanded, illegitimate, brute force passcode attempts.

PSA: The FBI Wants To Crack Your iPhone's Passcode

This is a classic case of same story, different day. If you recall, in the wake of the San Bernardino shooting in 2015, the FBI had a showdown with Apple where they wanted Apple to give them access to the shooter’s iPhone 5c, which was locked with a passcode. Apple provided what help they could, but stopped short of doing what the FBI ultimately asked them to do, which was build a backdoor that would’ve let them in.

Now, in the wake of the Pensacola shooting, the FBI is again asking Apple to unlock a device for them. Apple has provided all of the data they can, including information from the shooter’s iCloud account, but they are again refusing to build the FBI a backdoor.

The technological aspects of this can be quite confusing, but put simply, the type of encryption that Apple uses to secure iPhones and iPads prevents anyone who doesn’t have that device’s passcode, including the FBI and Apple itself, from being able to access the contents of that device. There is no backdoor, there is no secret key. They do not exist.

While it would be possible for Apple to build a key that would let the FBI in, it would be inexplicably dangerous. It would require Apple to build an altered version of iOS which could then be installed on a device that law enforcement wants to unlock. Apple’s concern is that if such software was created, law enforcement could take advantage of it, a rogue operative could get access to it and then spread it around on the dark corners of the internet, etc. There are an infinite number of ways that the existence of such software could destroy the security of every iPhone and iPad in the world. In essence, if Apple creates software to get around the passcode of this one device, that same software could be used to get around the passcode on YOUR device. Apple CEO Tim Cook described such a version of iOS as the “software equivalent of cancer”.

The FBI is framing this in a way that makes it sound like they don’t want a magic key, they just need into this one device. They keep asserting that they don’t want a backdoor. But the problem is that, essentially, they’re still asking for a backdoor. They’re getting deep into the semantics to try and move public perception to their favor. In any case, what they call it doesn’t matter, because what they want is a master key. Once that master key is created, it’s out there forever, and your device’s passcode has been cracked, too.

Those who would give up essential Liberty, to purchase a little temporary Safety, deserve neither Liberty nor Safety.

— Benjamin Franklin

PSA: It's Time for A Digital Health Checkup

Once or twice a year, it’s important to take a stroll through your settings and make sure nothing is going on that you aren’t aware of. It only takes about ten minutes to conduct what I refer to as a “digital health checkup”, and there are a lot of things that could go awry if your settings aren’t right, so follow along with this handy guide to make sure you’re doing everything you can to protect yourself from things like data loss, security concerns, and privacy issues. While this is an outline for people who have Apple products (I don’t have enough hands on experience with Android devices to offer a comprehensive guide), many of the settings I suggest modifying are found on Android devices as well, they may just be worded slightly differently. Without further ado, open up your settings app and let’s get started.

This guide was made using iOS 13.2.3, so you’ll want to make sure you’re at least on iOS 13.0 for this guide to make the most sense to you.

Apple ID

First things first, tap the big banner with your name on it to check all your Apple ID settings. This is a really important section, because your Apple ID is what makes 90% of the things on your device work to their full potential. Under this page, there are a few things to check.

  • Name, Phone Numbers, Email — Here, you just want to take a quick peek and make sure that it has your correct name and contact info. If it doesn’t, update it.

  • Password & Security — Your Apple ID is one of the most important things I’m going to tell you about. Make sure you know your password, and make sure it’s a strong one. If you aren’t good at remembering passwords, don’t worry. Just come up with a secure one for now, and write it down so you don’t forget. We’ll come back to a better way to store your passwords in a bit.

  • Payment & Shipping — This tab is another quick check; just make sure the saved shipping addresses and payment info are correct.

  • Subscriptions — This is where you can see things that Apple charges you for on a recurring basis and cancel any subscriptions you no longer want. For example, this is where you’ll see in-app purchase subscriptions like Apple Music, as well as your iCloud storage plan.

The next three headings are all organized under the Apple ID section, so get cozy.

iCloud

While you’re still under the Apple ID section, we’ll want to look at your iCloud settings. This is without a doubt the most important page of settings you’ll need to wrangle in.

At the top, it shows a bar with your iCloud storage. iCloud storage is how a lot of data is saved on your phone, and is what enables it to magically stay in sync across your Apple devices. If your iCloud storage is low or you’re out, its extremely important to upgrade your storage plan. This can feel a little nickel and dime-y of Apple, but they’re truly providing a useful service here (besides, your phone probably cost $700+, what’s another $12-$36 per year to keep it running optimally?).

Below the iCloud storage section is a big list of apps with toggle buttons. There are a few that lead to other menus, but we’ll cover those in a minute. The rule of thumb with the toggles is that everything should be turned on. Assuming you don’t share an Apple ID with anyone, go ahead and flip every toggle to the on position; this makes sure that even if you don’t have a backup of your device, that content will still be kept safe, as well as be kept in sync across your devices. The most important ones are obviously going to be contacts, messages, calendars, iCloud Drive, and notes. It’s worth pointing out that if you don’t have an iCloud email address, turning that switch on will prompt you to create one. We’ll talk more about email later, but it’s a good idea to have an iCloud email account, so go ahead and set one up.

  • Photos — Of the few options that lead to menus, Photos is the first. Under this menu, you’ll want to make sure that iCloud Photo Library is turned on. This is what will save your photos if anything happens to your device, and it’s why it’s so important to make sure you haven’t run out of iCloud storage. You’ll also want to select “Optimize iPhone Storage” over “Download and Keep Originals”. This can save you a lot of storage space on your device, and you’ll still be able to see all your photos just like you always could, they just take an extra second to load the full resolution version. It’s worth enabling, especially if you don’t have a lot of extra device storage (local, on-device storage is different from iCloud storage — it’s a hardware component of your phone, and it can’t be upgraded — you can see how much local storage your iPhone or iPad has under General>iPhone Storage).

  • Keychain — This menu just leads to a simple toggle. Turn it on. It may have you go through a short setup process, but this is well worth the minute it takes to do so. We’ll talk more about iCloud Keychain later and how it can remember all your passwords for you.

  • iCloud Backup — As long as you have all the other toggles turned on, having a backup isn’t quite as important as everyone thinks, but still, having a belt and suspenders never hurts. Go ahead and turn iCloud backup on.

Find My

This is where you can control whether you’re sharing your location with your friends, update which device you share your location from, and temporarily (or permanently) disable sharing.

Family Sharing

If you want to be able to share your iTunes and App Store purchases, have a shared calendar and reminders list, all use the same iCloud storage plan, and share your location with your family, you can set up family sharing. This feature has a lot of benefits, but one drawback is that everybody’s iTunes and App Store purchases go through one person’s payment method. For more info on setting up family sharing, go here.

That’s all we need to do under the Apple ID section. All of the remaining settings you’ll want to check are found under the main settings page, so go ahead and head back there.

General

Another quick one. Under the “General” tab, check these few things.

  • About — Make sure your iPhone is named something like “Broc’s iPhone”, rather than the default “iPhone”. This is important so people can recognize which device belongs to you when using features like AirDrop.

  • Software Update — I’ve already mention software updates once, but they’re very important. If you have a pending software update, do it. Also, make sure you’ve enabled automatic updates so you don’t have to start them manually in the future; your device will take care of it for you in the middle of the night when new updates become available.

  • VPN, Profiles — Scroll down to the bottom of the “General” tab, and if you see a button that says “VPN” or “Profiles”, tap on it. If you don’t recognize the profile or VPN that’s been installed, remove it immediately. Scammers will sometimes try to talk people into installing these because they can provide dangerous access to everything you’re doing on your phone. If you don’t see either of these tabs at all, that just means you don’t have any to worry about.

Face ID & Passcode, Touch ID & Passcode

Make sure you’ve set up a strong passcode and are using Face ID or Touch ID. Biometric data, including your facial recognition and fingerprint scans, are ONLY stored on your device in a Secure Enclave. They’re never shared with Apple, never sent to iCloud, and never shared with your apps. They make your device much safer from theft and unauthorized access, and the features are so fast and work so well that you hardly notice they’re there.

Emergency SOS

This is a relatively new, potentially lifesaving feature that allows your phone to come to the rescue if you’re in danger. It provides a fast way to call emergency services, as well as share your location and send an SOS message to designated emergency contacts when the feature is used. Just make sure you’ve taken a minute to designate those contacts and know how to engage the feature if you ever need help. It’s easy to set up, but if you need some guidance, here ya go.

Privacy

This is the section that will take the most time, but it’s because it’s one of the most critical. For each of the sections below, when you tap on that menu, you’ll be presented with the list of your current apps that have requested access to that particular hardware element or type of data. After adjusting these settings, you’ll be more aware when apps send those white pop up boxes asking for access to your location or camera, and be able to make more informed decisions about whether to allow that access or not.

  • Location Services — First, you want to be using location services, but you want to be smart about it. Scroll through the apps that have requested access to your location, and decide which ones truly need that access to function. Apps can offer up to four location access options: never, ask next time, while using the app, and always. There are almost NO apps that need always on access to your location, and you should automatically be suspicious of any that request it. This comes down to your individual judgement, but almost all of my apps are set to “never”, while some are on “ask next time”. A handful of min are allowed access “while using the app”, but almost none are given “always” enabled access.

  • Contacts — Apps like Facebook will ask for access to your contacts so they can create networks of everyone you know. This is obviously bad, so you should almost always turn off access to your contacts for every app.

  • Photos — A lot of apps will abuse having permsission to your whole photo library. If they don’t need it, cut off their access.

  • Bluetooth — If you don’t know why an app needs bluetooth, turn it off. Bluetooth can be used to track your location even if you’ve already denied that same app access to your location.

  • Microphone — There are a lot of apps that ask for microphone permission, but very few actually need it to work properly. Scroll through this list and turn off everything that doesn’t have an obvious need to hear what’s happening around you when you use that app.

  • Camera — Same deal here: a lot of apps abuse camera privileges (Facebook just got caught doing so). If an app doesn’t absolutely NEED access to your camera to work properly, turn it off.

  • Advertising — Under this menu, make sure you turn on “Limit Ad Tracking”. This is a feature that Apple built to throw invasive advertisers off your trail, and make it harder for companies to spy on you and track your activity across apps. There’s no downside to enabling it, but there’s a huge upside.

Wallet & Apple Pay

I would encourage everyone to set up and use Apple Pay in stores, online, and in apps. It’s much safer than using a normal card because it requires authentication before allowing payments to be processed, and it doesn’t give merchants your real name or card number, so you would be totally protected from breaches like the one that affected millions of Target customers a few years ago. Plus, Apple Pay is a lot more convenient and the transactions process about four times faster than waiting on your chip card to sit in the payment terminal.

Passwords & Accounts

This is that bit I was promising about making it easier to keep up with your passwords. Since you’ve already turned on iCloud Keychain, this is where it becomes useful. Under the “Passwords & Accounts” menu, you can tap “Website & App Passwords” to view all the passwords you’ve saved to your iCloud Keychain.

  • Autofill Passwords — Make sure this is enabled, and your device will automatically fill in your sign in information on apps and websites where you’ve told it to remember your login info. You’ll never have to memorize another password, besides your Apple ID password, which is the master password that protects all of the ones in your keychain (so again, make sure it’s very secure!).

Mail

I personally use a few different email services, but I use iCloud as my main account. It’s a lot safer and more private than services like Gmail or Yahoo!: those companies read through your emails and use the content to send you targeted ads, whereas Apple will never read or share the contents of your inbox. You don’t have to switch all at once, but it’s a good idea to get away from companies like that. In any case, there is one specific setting to adjust no matter which accounts you use.

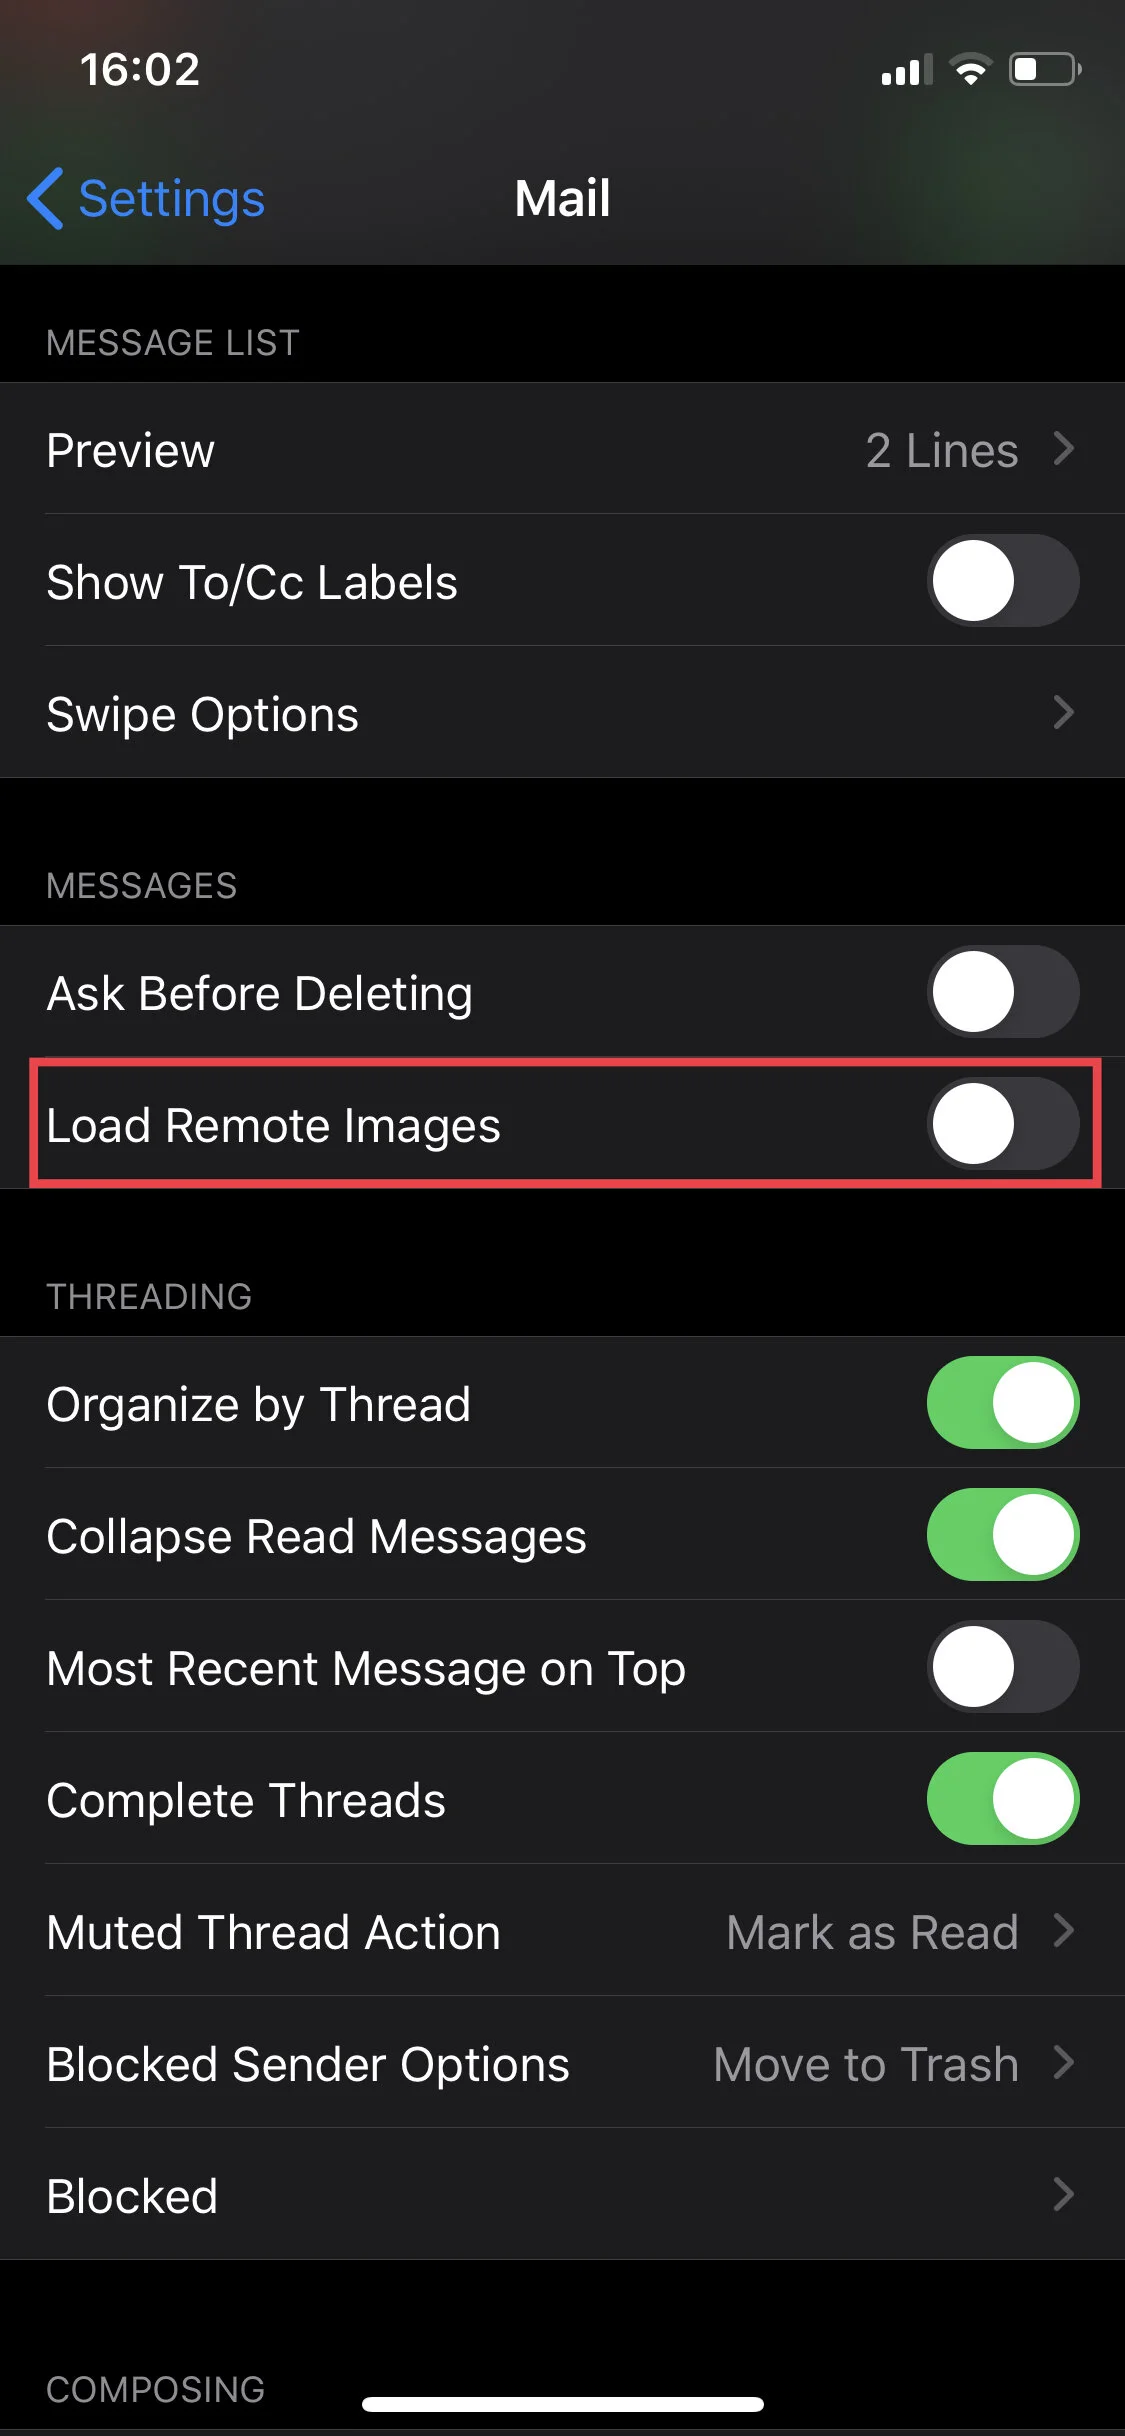
  • Load Remote Images Ensure this setting is disabled. Having it turned on can allow people and companies who send you emails to know when, where, and how many times you opened their messages using a deceitful technology called “surveillance pixels”. If a sender sends you an email that includes images you DO want to load, you can enable them with one tap for that specific email, rather than having it on by default.

And thats it, your Digital Health Checkup is complete! This may have been more than ten minutes of adjustments for some folks if your device was particularly messy, but for most it’s a quick process of fine tuning that can make your device a lot safer, help it run better, and provide you with some useful features you may not have been taking advantage of. As a former Apple employee, I feel qualified to say that this is a comprehensive overview of the most important and sensitive settings your device has. If you’ve followed along with this guide, you can feel confident that you’re doing everything you can to protect yourself and your data. Should you have questions or run into any issues adjusting your settings, feel free to reach out!

PSA: Android Apps Can Collect Camera, Microphone, and GPS Data without Permission While Device Is Locked

Erez Yalon, reporting for Checkmarx:

After a detailed analysis of the Google Camera app, our team found that by manipulating specific actions and intents, an attacker can control the app to take photos and/or record videos through a rogue application that has no permissions to do so. Additionally, we found that certain attack scenarios enable malicious actors to circumvent various storage permission policies, giving them access to stored videos and photos, as well as GPS metadata embedded in photos, to locate the user by taking a photo or video and parsing the proper EXIF data. This same technique also applied to Samsung’s Camera app.

In doing so, our researchers determined a way to enable a rogue application to force the camera apps to take photos and record video, even if the phone is locked or the screen is turned off. Our researchers could do the same even when a user was is in the middle of a voice call.

Android devices have always been user hostile, but this example is startling. If you have an Android device, it is truly time to switch.

I’ll admit, I’ve always had iPhones, so it’s easy for me to say that Android users should switch teams. I have friends who’ve always had Androids, and we occasionally rib each other over our loyalty to one brand or the other, but this is a lot bigger than that; I’m no longer suggesting that they switch out of jest, now I’m making those recommendations because I care about them and I don’t want to see them taken advantage of by devices they think they can trust.

I don’t care what team you picked, I don’t care what team I picked, the truth is that, at a technical level, one of these systems was built from the ground up in a way that prevents bad actors from gaining unfettered access to your device’s camera, microphone, and GPS, and the other was not.

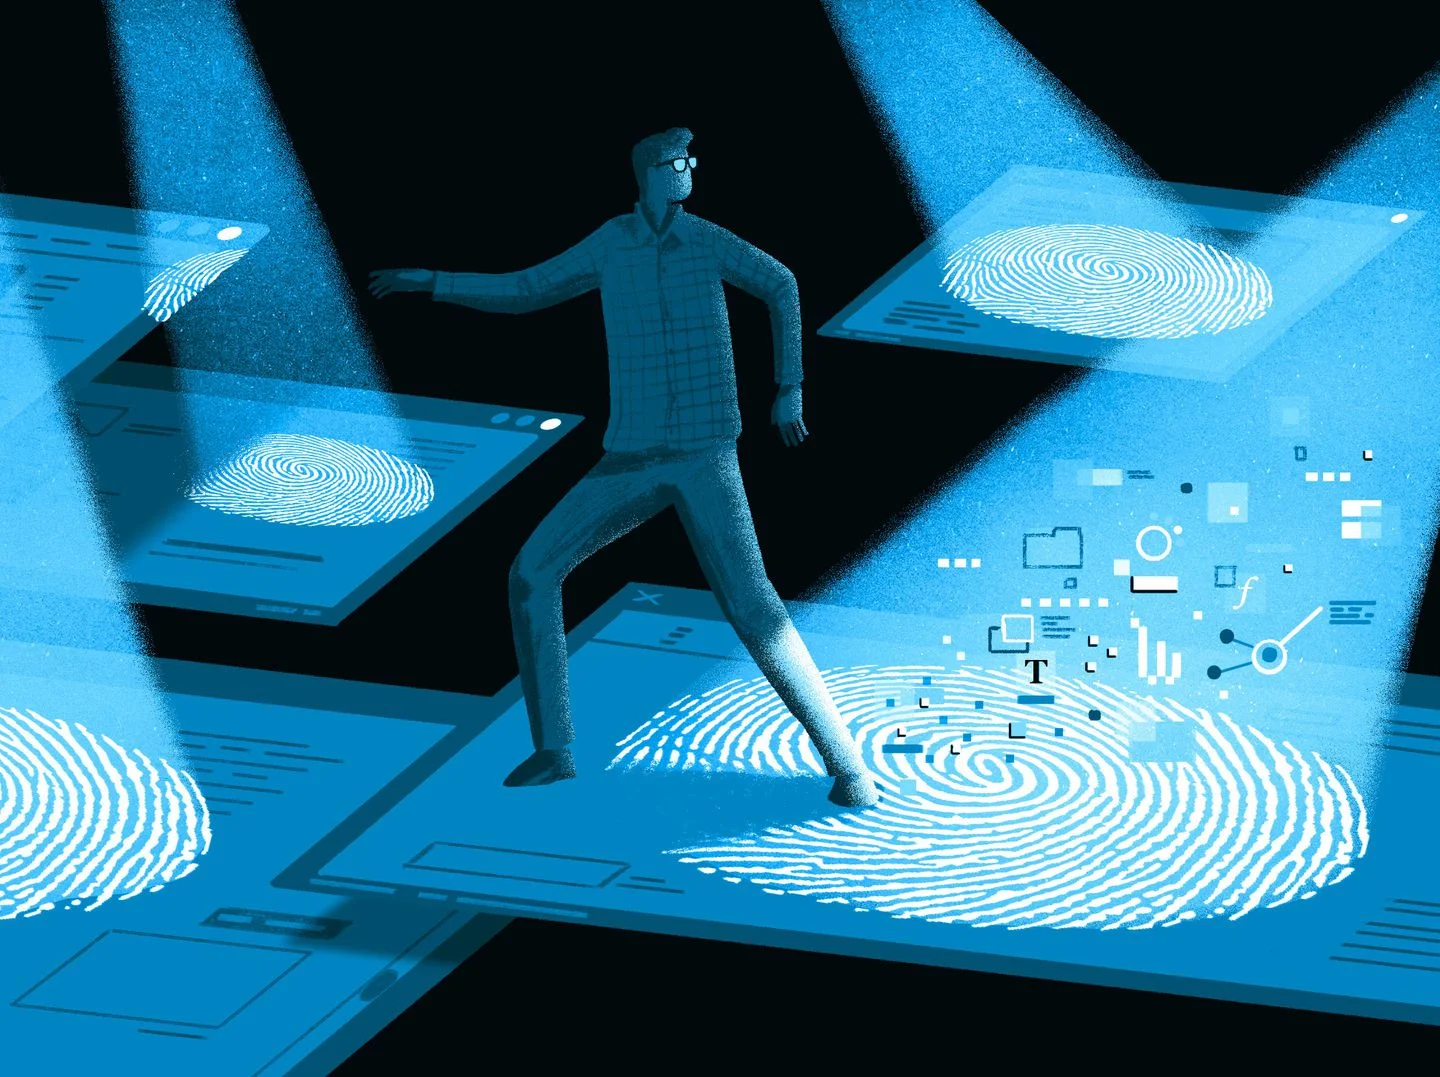
PSA: Online Fingerprinting Allows Websites To Track You

Geoffrey Fowler, writing for The Washington Post:

Fingerprinting happens when sites force your browser to hand over innocent-looking but largely unchanging technical information about your computer, such as the resolution of your screen, your operating system or the fonts you have installed. Combined, those details create a picture of your device as unique as the skin on your thumb.

This piece provides a good explanation of the predatory practice of online fingerprinting.

Unfortunately, there’s no clear answer on how to prevent websites from identifying you via fingerprinting, but some devices and web browsers are safer than others. As Fowler explains, Apple devices using the Safari browser are the most protected from this threat. If you have an iPhone, Mac, or iPad, you should definitely be using Safari — it’s already the fastest and most battery efficient browser for Apple products — because they’ve built in a lot of protections to keep users safe from fingerprinting. Fowler also points out that Google Chrome has almost no protections in place to prevent fingerprinting; if you use an Android phone or a Windows computer, you should use Firefox instead of Chrome as your default browser.

Also, props to Fowler for calling out his own publication for using fingerprinting on their website; that’s true, courageous journalism.

PSA: Disable Automatic Remote Image Loading in Your Email Client

The issue of digital privacy and security will always be a moving target, because no matter how many bugs are squashed or patches get pushed, bad actors and greedy corporations will continue to scope out vulnerabilities that they can use to exploit people. It is more important than ever to do what you can to protect yourself.

Lately, a lot of attention has been given to a big privacy issue that affects pretty much all email users. The problem lies in the use of something called surveillance pixels, a type of nonconsensual technology where someone who sends you an email can put something in the message that will provide them with a shocking amount of strikingly private information about the email recipient, including the dates, times, and locations for each time they open the sender’s email. This became a hot topic a couple weeks ago after a shady company called Superhuman was exposed for utilizing surveillance pixels to provide their users with access to this data for every email they send. Superhuman isn’t the only company to do this however, companies like MailChimp and other mass marketing email providers do it as well (though I believe its use for business purposes doesn’t negate the fact that it is still a breach of privacy and should be condemned just as strongly), but Superhuman does seem to be the first to make it so easily available to non-business users.

Fortunately, there is a way you can protect yourself from this privacy violation, and you should. Most mail clients offer an option to disable automatic remote content or remote image loading. Adjusting this setting will prevent your device from downloading the surveillance pixels in these emails automatically so that senders won’t be able to use them to collect this data. If you have an iPhone or iPad and you use the Apple Mail app, go to the “Settings” app, tap “Mail,” and then toggle off the switch labeled “Load Remote Images.”

After learning of how companies use this technology to take advantage of users about a year ago, I decided to disable remote image loading on my own devices, and I’m glad I did. To be clear, there is a slight downside because this will prevent some other images in emails from loading, but it is easy to chose to load the images for any individual email with a single tap if you do want to see what was attached; just know that you could also be enabling a surveillance pixel in that email if you do chose to load the images. Overall though, this is definitely a setting you should adjust if you don’t want everyone who sends you email to be able to know exactly when, where, and how many times you open their messages.

PSA: No, You Shouldn't Cover Your Phone's Selfie Camera

The Mashable author whose article I wrote about earlier this month, Jack Morse, is back with yet another terrible piece highlighting his inept understanding of digital privacy and security. You do NOT need to cover your phone’s front facing camera (at least not if you have an iPhone, which you probably do if you care about decent selfies in the first place). The only decent reason he gives for suggesting you do this is the FaceTime bug from earlier this year, which was patched in just a few days and extremely obvious when it happened to you; it was definitely a cause for concern, but not a reason to carve up a post-it note with an X-Acto knife to make yourself a selfie cam cover as he ludicrously suggests. Seems like Jack Morse has a habit of shameless fear mongering to drive clicks, which is NOT how we’re going to make the digital world safe for consumers again.

PSA: Parental Control Apps and Devices are Harmful to Your Child

I have a lot of thoughts about the abundance of parental control apps and devices on the market today, and my belief is that they do more harm than good.

Devices and apps that block access to certain sites and restrict times when your child can use the internet (like the Circle device) are frighteningly authoritarian. People generally don’t understand the wealth of information that these sorts of devices have access to, and companies are all too willing to abuse that access because they know parents don’t know the extent of it, and thus they can get away with it. Even worse are the plethora of these apps that take far more data than they need, and give (or sell) it to other companies that you’ve never heard of. Life360 is one such app that shares your child’s location and other sensitive data with third party companies for advertising and other purposes, but parents don’t realize this because they were too lazy to read the privacy policy, and subsequently too quick to install it on their kid’s iPhone after hearing about it from their parent-friends (if you have the Life360 app on your child’s device, I urge you to delete it immediately).

Parents get caught up on all the “benefits” of apps like this, and usually don’t realize that most of the features they enjoy most (such as screen-time management, location tracking, and age-based website filtering) have already been implemented in one way or another by Apple. I know my viewpoint is one-sided in presuming that everyone uses Apple devices, but research shows that 83% of U.S. teenagers use iPhones. And come on, if you’re buying your kid an Android phone, you clearly don’t care about their privacy anyway, so this article isn’t for you.

To be clear, I don’t just have a problem with companies violating children’s privacy; I think its bad when their parents do it too. Some people might say that because it’s their child and it’s their responsibility to care for them, that the child’s privacy is not relevant, but I emphatically disagree. Just because a person is young doesn’t mean that they don’t have a right to a certain amount of privacy, and I believe it is essential for children to have this to start exploring their own ideas and become confident in their ability to do some things independently, and this becomes far more true when we start talking about teenagers. My opinion is that you should’ve raised your child well enough that by the time you’re giving them a device with an internet browser (wether it’s an old iPad when they’re six or their first iPhone at thirteen), you trust them not to look for things that you consider inappropriate. It is one thing to try to prevent your eight year-old from stumbling across daddy’s PornHub history when they’re using the computer, but it’s another thing to be intercepting all of your fifteen year-old’s private messages. Apps that scour text messages, photos, browser history, etc. and send alerts to a parent any time something even questionably inappropriate is found go too far and violate their privacy.

Censorship and pervasive surveillance are tactics implemented by governments who are fearful that they cannot keep their citizens under control, not methods that should be utilized by any decent parent in the free world. Parents should be very cautious and do a lot of thinking before they install any sort of hardware or software with the intent of controlling or keeping tabs on their children. Furthermore, it is extremely irresponsible to use any device or app for this purpose if you haven’t legitimately read the privacy policy.

At the end of the day, I don’t think these apps and devices should be used anyway; the small benefit does not outweigh the massive risks. Plus, your kid probably understands the technology better than you do anyway, and most of these systems aren’t difficult to get around. If your son or daughter is trying to talk to someone or find something on the internet, you probably won’t impede them for very long. You can raise your kids how you want, but doing things like this puts them at more risk than simply leaving them to their own devices (no pun intended).


PSA: Always Do Your iOS Updates

I have been asked by more people than I can count about whether or not they should install iOS updates. Because there is a lot of misinformation about the true pros and cons of keeping your devices on the latest software, I decided I would weigh in on the topic publicly. 

A lot of people think that iOS updates don’t matter, so they don’t bother taking the time to install them because they think it takes too long, but this isn’t really the case anymore. The most recent update (iOS 12.3) took my iPhone XS Max only 9 minutes to download and install, from start to finish. And if you can’t find nine minutes, your phone can update itself for you while you’re sleeping. 

Furthermore, the updates DO matter, and they matter a lot. A lot of bug fixes are rolled out with each update, so the reason your phone is acting up could be a direct result of the fact that it HASN’T been updated yet. Additionally, iOS updates frequently include security patches which are absolutely essential, so from a privacy and security point of view, it’s a terrible to avoid software updates. Frequent software updates are a large part of what makes the iOS platform so superior to Android when it comes to privacy and security.

Lastly, we have to address the common concern that Apple pushes out updates on a regular basis to further their own interests. I am no longer employed by Apple, so I have no reason to be dishonest when I tell you that Apple is not trying to use software updates to drive iPhone sales. They do not intentionally make your phone slower. They do not intentionally make your phone buggy. They do not intentionally try to decrease your battery life. All of these concerns are usually only reported by people using devices which are several years old, and at that point the processors are comparably inefficient and are therefore struggling to keep up with the new, more advanced software. If your iPhone is less than 4 years old, this should not be a concern for you.

The bottom line: when your iOS devices tell you that they need to be updated, it is in your best interest to update them.